


Gorilla Weight Mold Kit
The Gorilla Weight Mold kit is designed for those of you who want to lift, but not break the bank. Our kits includes everything you will need to produce a pair of beautiful, strong concrete weights. Gorilla Weight Molds are made with durable plastic which can be used multiple times, saving you hundreds of dollars. Our mission at Gorilla Weight Molds is to provide people with an affordable way to stay fit.
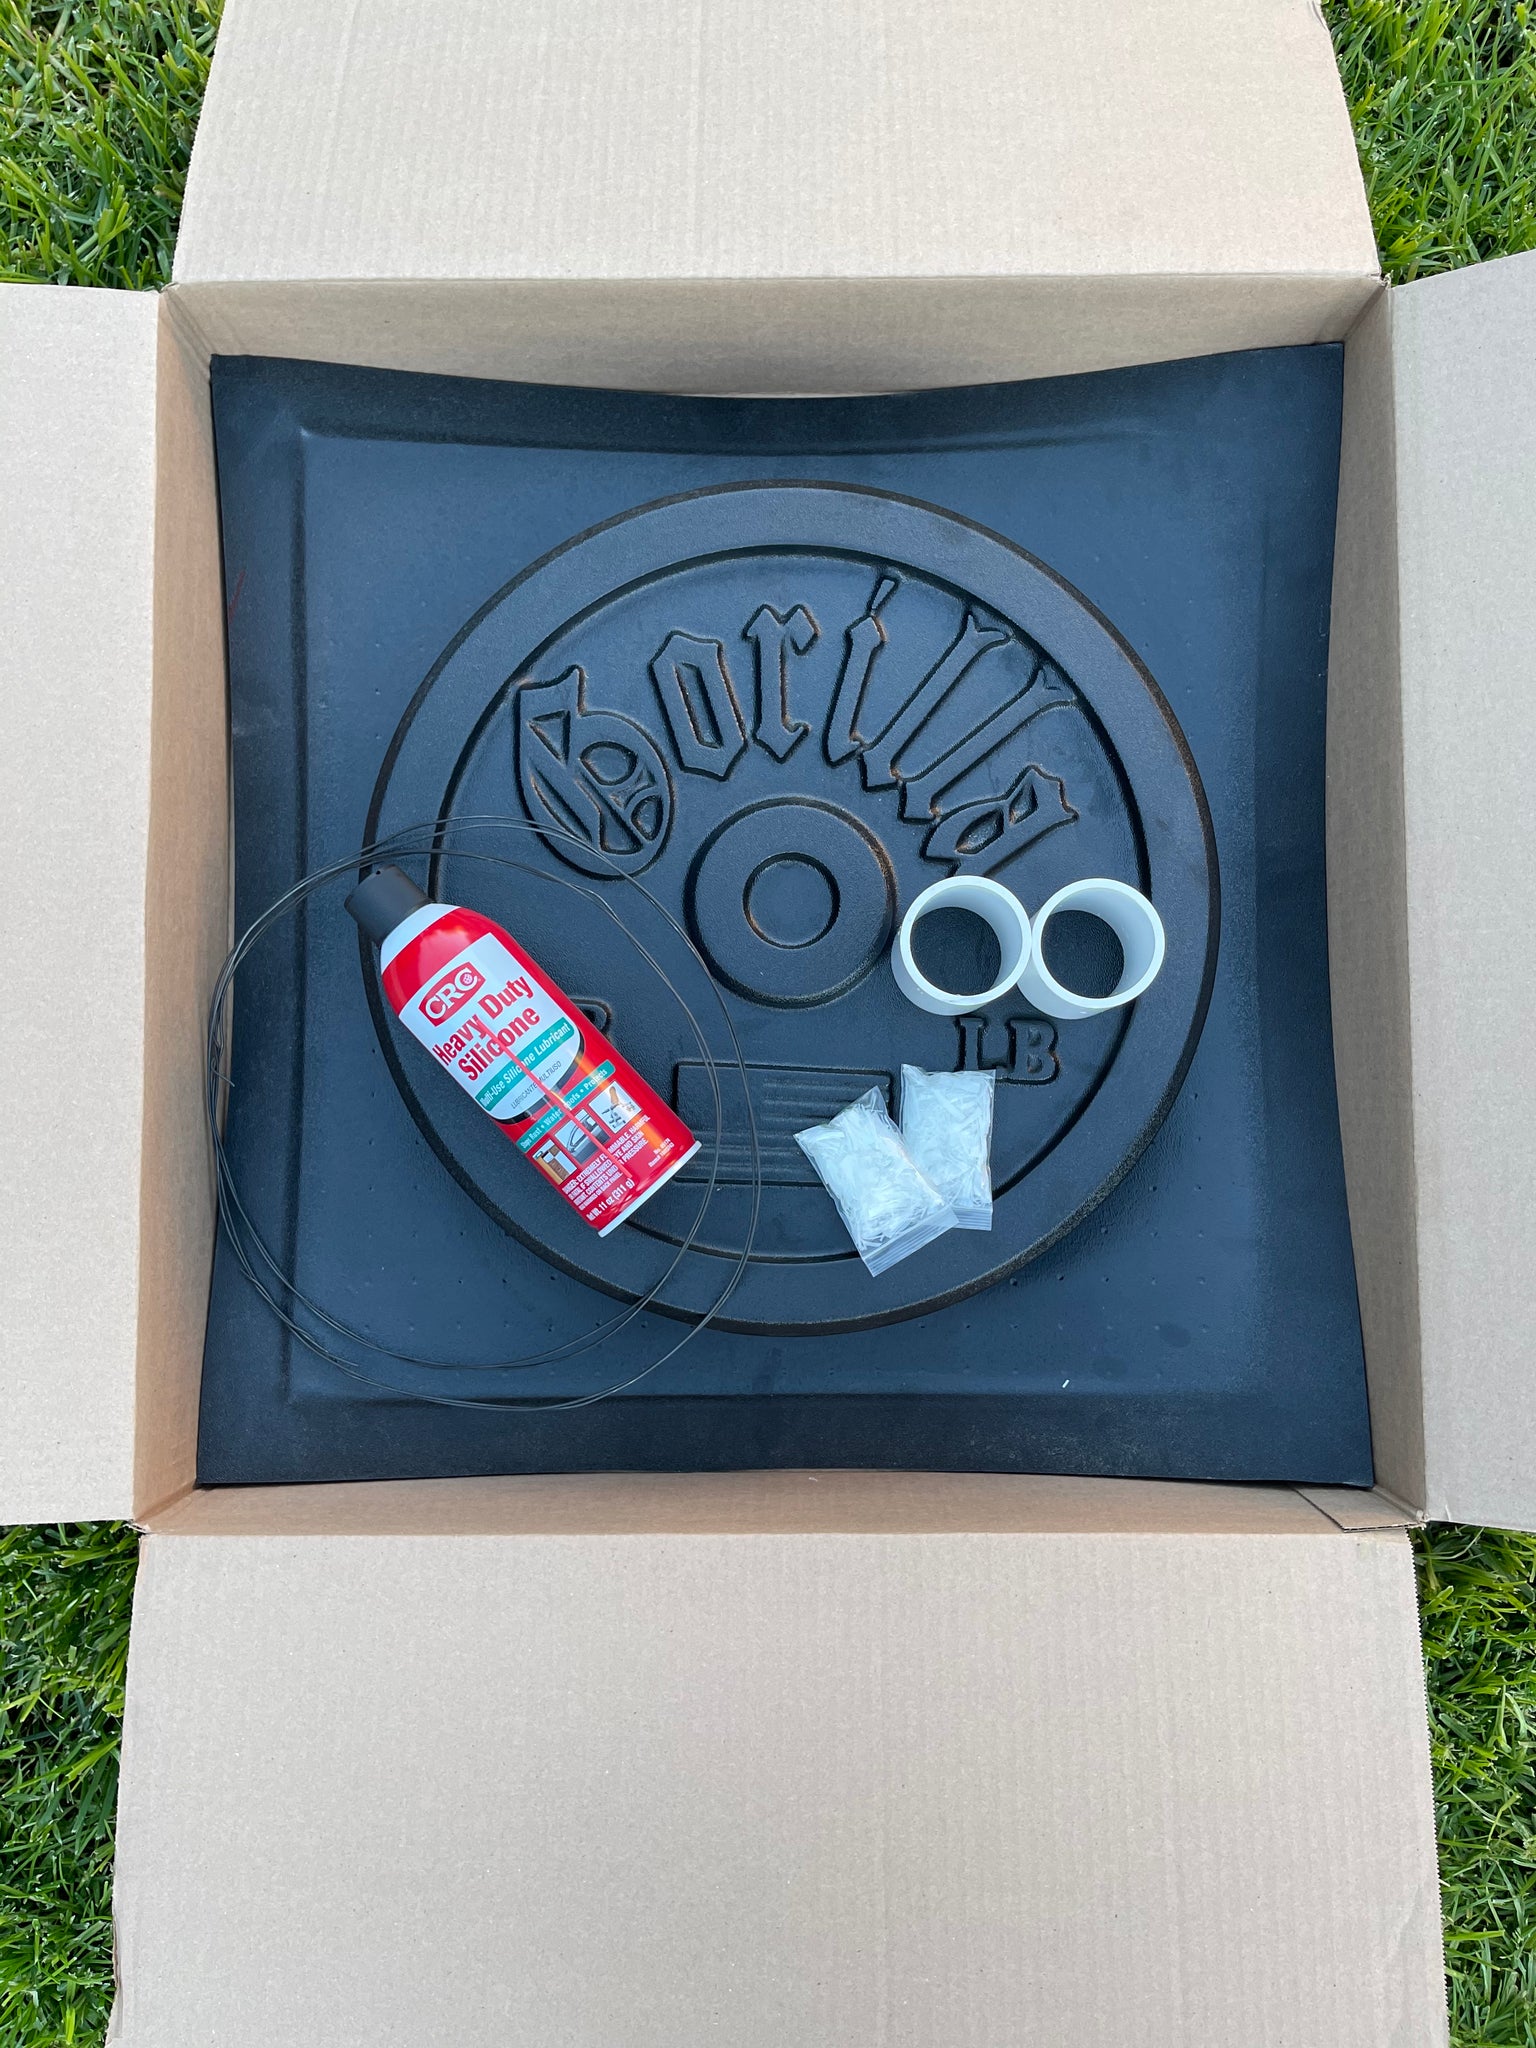
Whats included:
Gorilla Weight Mold
Two (2) 2" ABS sleeves (for olympic size barbell)
Two (2) metal wire rings (for reinforcement)
One (1) ounce of fiber (for reinforcement)
One (1) 11 oz. silicone spray can
Instructions
Making a pair of Gorilla Concrete Weights is simple! All all you will need to purchase is high strength concrete mix with a minimum PSI of 4000 LBS.
Step One:
Prepare your gorilla weight mold. This will involve attaching the 2" ABS sleeve to you your mold center. They should fit snug without the use of silicone or hot glue, but either can be applied to make certain the sleeves do not move during your pour.
Step Two:
Once you have the sleeves are attaches to the mold, you will need to spray the mold with the provided silicone spray. Apply a liberal coat of the silicone onto the entire inside of the mold. Just be sure to wipe off any excess, you don't want any silicone puddling as this may cause air pockets on the face of your weights. Any excess spray silicone can be wiped with a paper towel. Now your mold is ready to be filled with concrete.
Step Three:
Prepare the concrete. The size of the mold you purchased will determine the amount of concrete mix you will need. Concrete will typically retain 90%-95% is original weight when cured. So this mean that if you want a 45LB plate you will need to fill the mold with anywhere between 49.5LBS to 47.25LBS. This will guarantee your weight plate will be at least 45LBS. Mixing the concrete is simple, just add water and the provided fiber reinforcement. We strongly recommend you wear a respirator as concrete dust can be harmful if inhaled. The amount of water will depend on the manufacturers recommendations, but we suggest your mix be the consistency of oatmeal.
Step Four:
Fill the mold. Now that we have our mold prepared and the concrete mix ready, we can begin to fill the mold. Filling the mold is best done in small amounts. We have found that the best results are achieved by adding the concrete to the mold by hand, we strongly recommend you wear gloves. Make sure you are pakcing handfuls of concrete into every crevasse to end up with a smooth finish. Once you have filed the mold half way, you will add your metal reinforcement ring to the center of the mold. Continue filling the mold and twisting the mold in a left to right motion, the will help prevent air bubbles from being trapped and resulting in stronger weight. Lastly it is recommended to tap the side of the mold with a stick to help in releasing any trapped air bubbles in the concrete.
Step Five:
This step is optional but suggested. Cover your weights with a plastic bag. This will help keep as much of the moisture in the concrete as it cures. Set your mold aside on a flat and level surface for a minimum of 2-4 days. the longer you allow the plates to cure the stronger they will be. Concrete is at about 70% strength after a few days and fully cured in about 28 days. This does not mean you have to wait 28 days to use your weights, weight and be handled after 2-4 days.